
Veryfi takes the stress out of bookkeeping, even when using offline software such as Intuit QuickBooks Desktop. We’ll show you how to collect receipts and bills using the Veryfi mobile app and then send them to your QuickBooks Desktop account.
Before we proceed, it’s important to note several things. First, you must start an account with Veryfi to access Connected Apps like QuickBooks. Signing up is free and takes less than 30 seconds. Learn more about member benefits here.
Second, the instructions below make references to “IIF” files. This file format was developed by Intuit and stands for “Intuit Interchange Format.” These files enable you to import lists and transactions into your QuickBooks account.
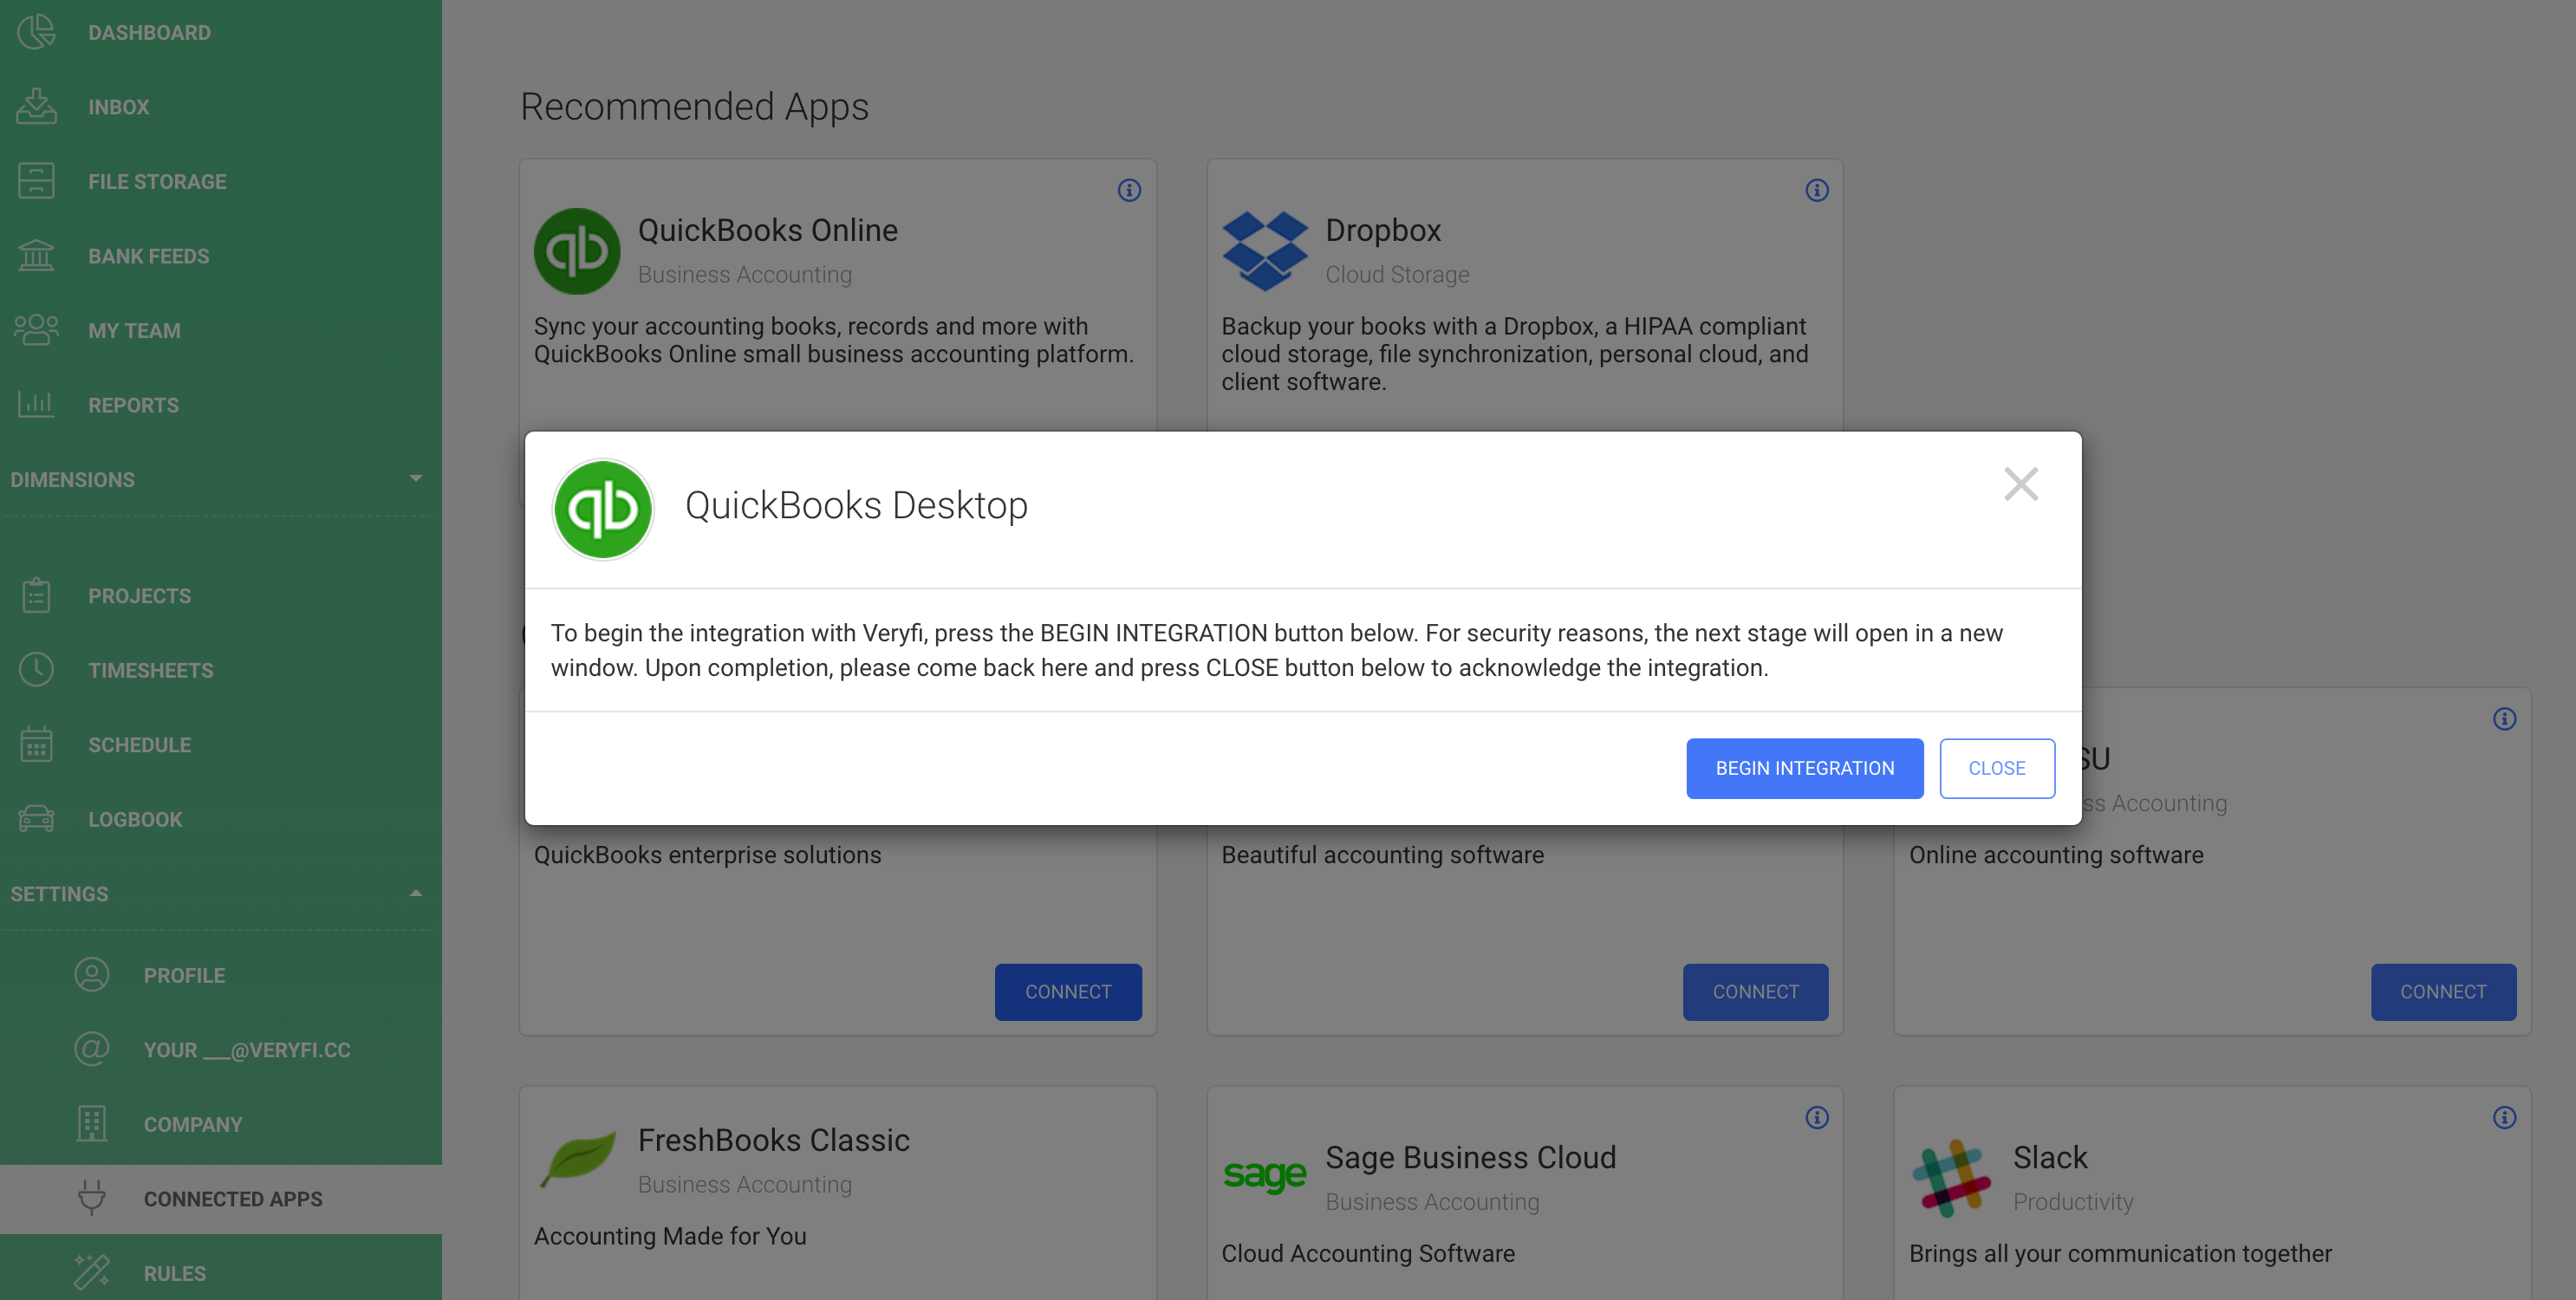
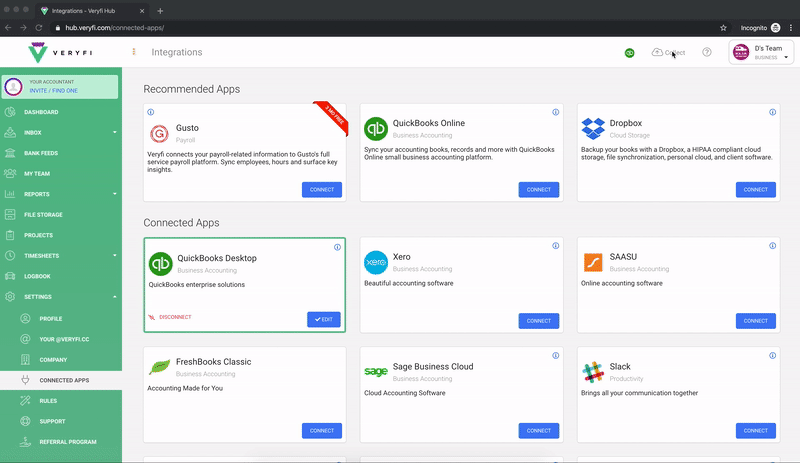
1. CONNECTION
Inside Veryfi Hub, navigate to “Settings” > “Connected Apps” and locate QuickBooks Desktop Card.
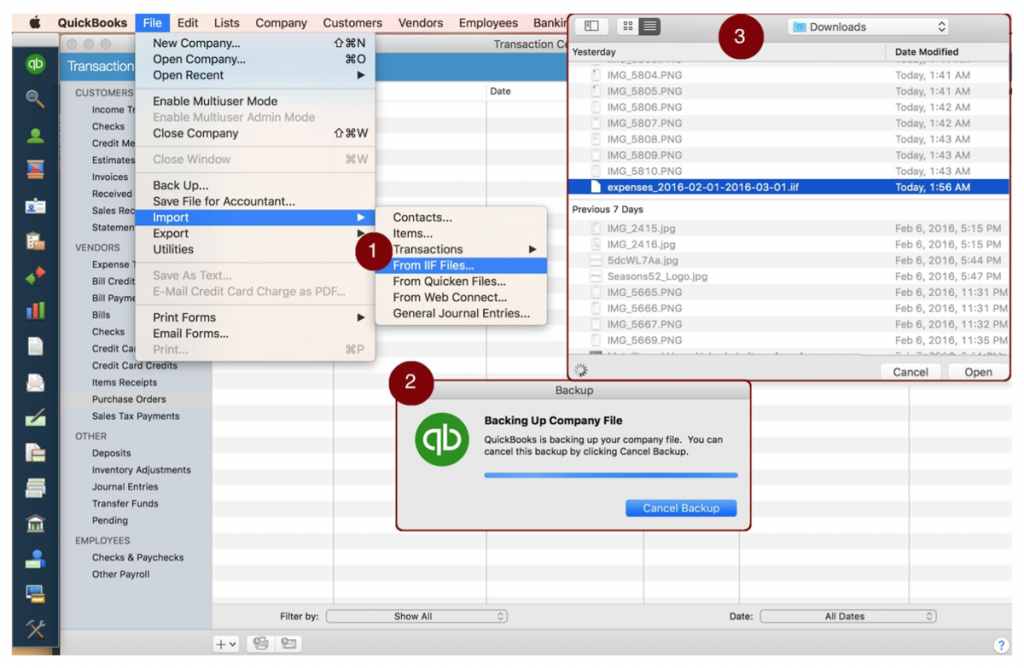
2. EXPORTING IIF WITH CHART OF ACCOUNTS
At this point, you need to export an IIF file of your Chart of Accounts, Customers, Vendors, Items, and Classes from your QuickBooks Desktop account. The screenshot below shows the necessary steps to take inside QuickBooks Desktop.

Once you’ve exported your data from QuickBooks, drag and drop that file into Veryfi:
Allow about a minute of processing time. You’ll be notified when this is complete through both a message on your screen and an email. Veryfi parses your IIF file and creates the same list of Categories you have in QuickBooks and populates Customers/Jobs under Customers/Projects in Veryfi. If you use Classes in QuickBooks, you will see them as Tags in Veryfi and if you use Items they will be populated under Job Cost Codes.
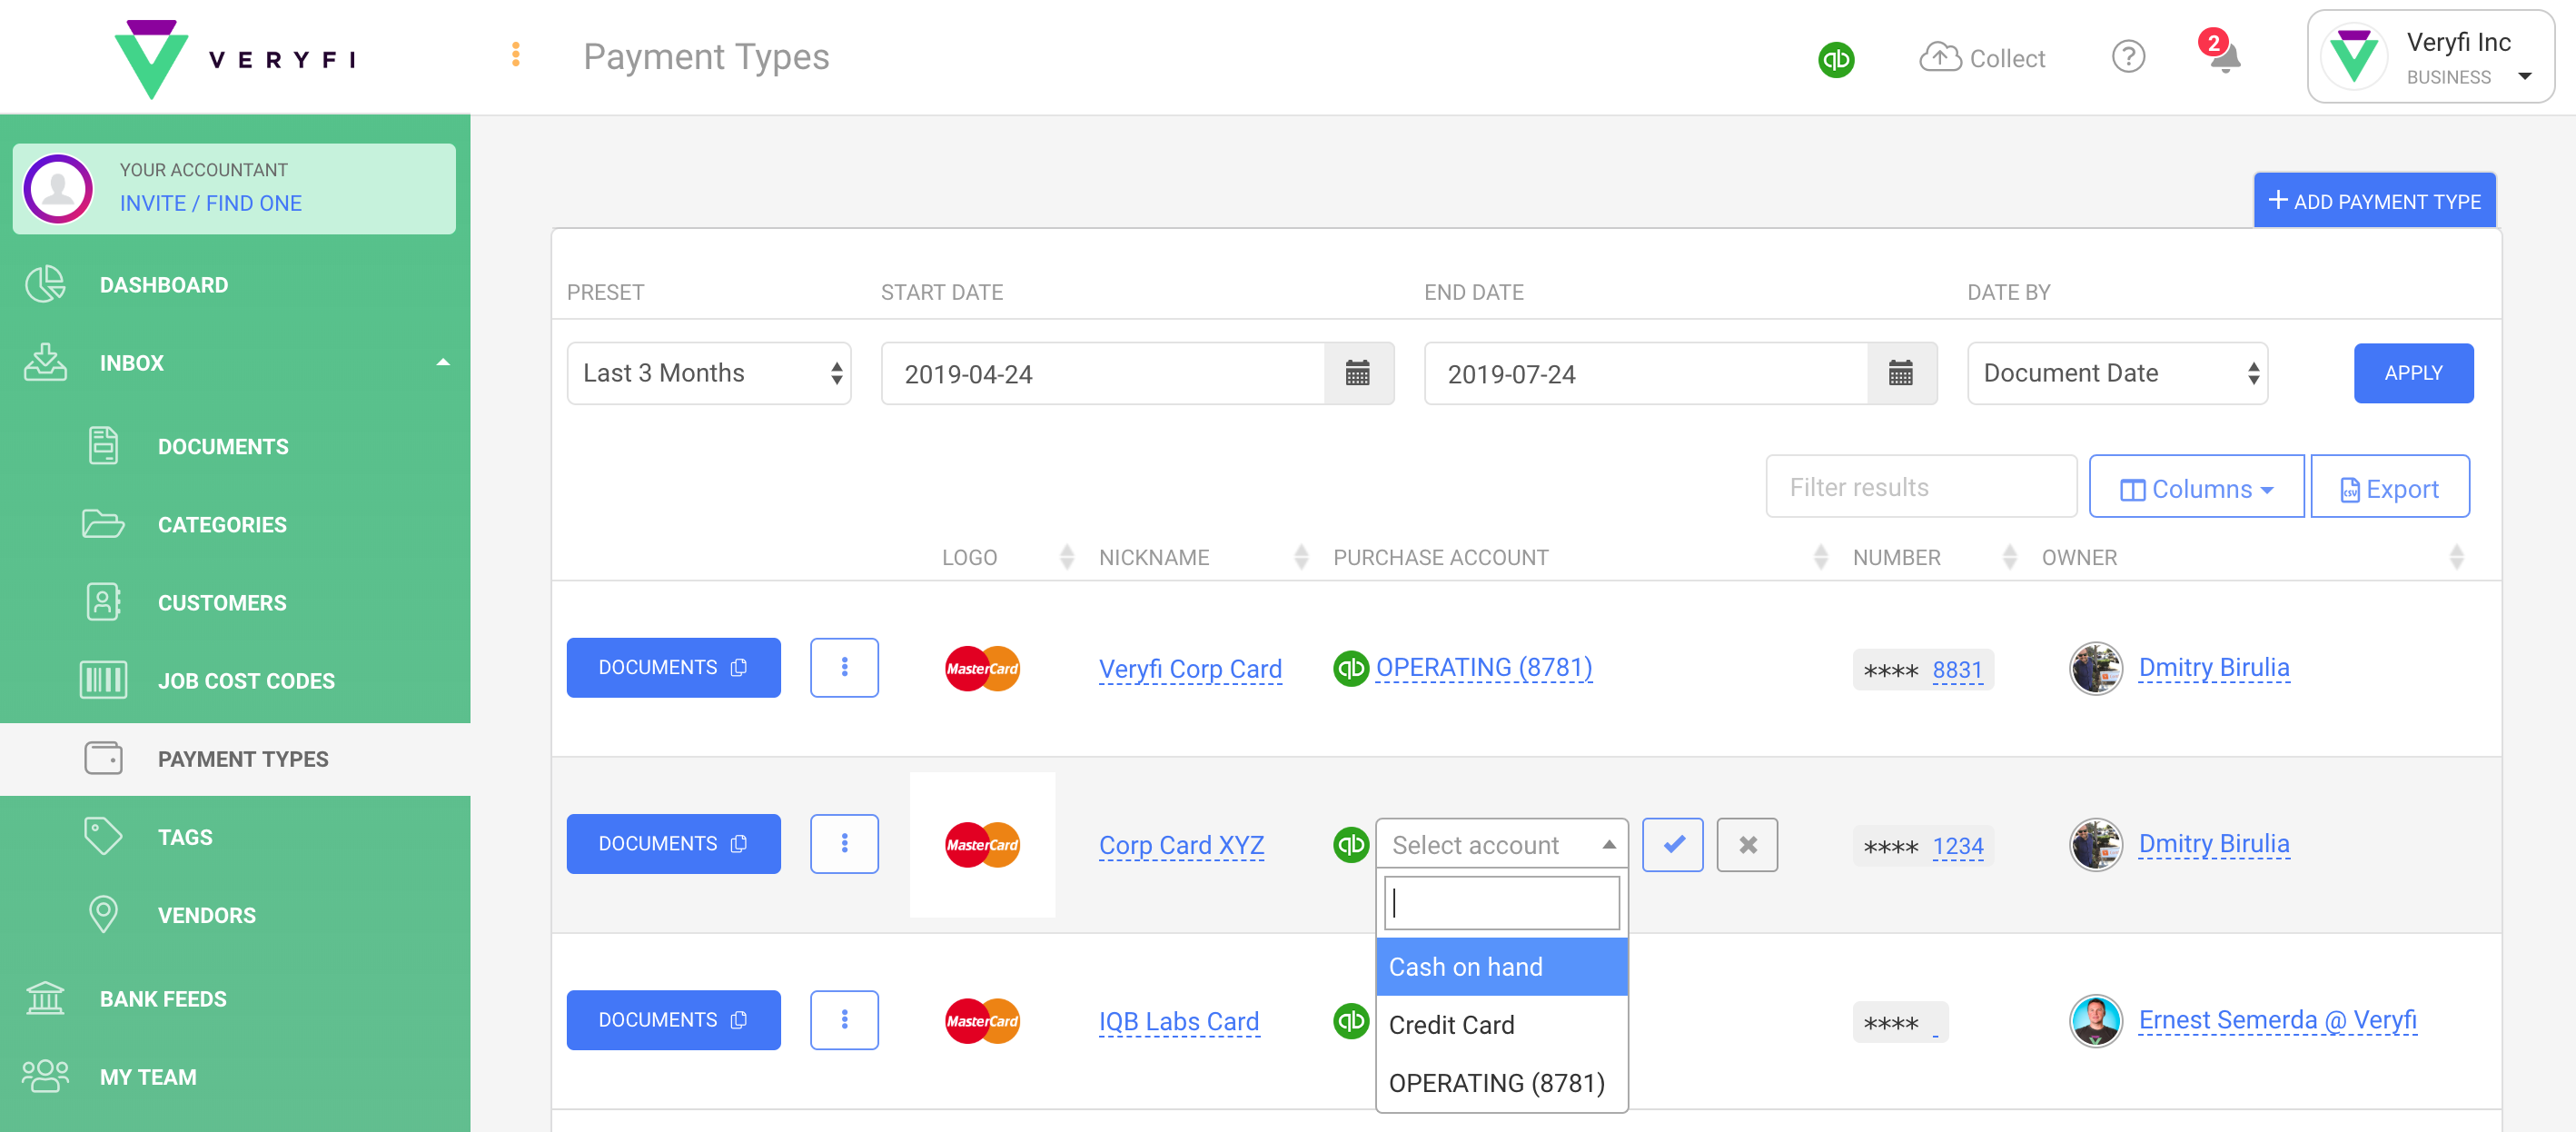
3. MAP YOUR PURCHASE ACCOUNTS FROM QUICKBOOKS
After linking QuickBooks to your Veryfi account you will need to map your Payment accounts in Veryfi with your Purchase Accounts in QuickBooks Desktop. This can be done by navigating to “Inbox” > “Payment Types”
4. IMPORTING RECEIPTS INTO YOUR QUICKBOOKS DESKTOP
Generate Veryfi .IIF report:
- Navigate to “Reports” > “Documents” (https://hub.veryfi.com/reports/generated/?type=receipts)
- Click on “+ Create Report” button
- Choose date range and select IIF option as the Report file format
- Select any other required filters in the Advanced Options section, then click on “Create Report” button
- A report with the .IIF file will be emailed to you within 5 minutes. It will also be available for download in “Reports” > “Documents” inside the Veryfi Hub
5. IMPORTING IIF WITH TRANSACTIONS
The report email you created will contain the IIF file with your transactions. It will also include instructions on how to import that file into your QuickBooks Desktop account. The actual receipt images are not included in the IIF file (this is a limitation of the IIF format). However, the notes field for each transaction will have a direct link to the document image in the Veryfi cloud so you can download your receipts as required.
That’s it. All your purchases and bills are now available inside your QuickBooks Desktop account, as shown in this graphic.
UPDATING CHART OF ACCOUNTS, VENDORS, PROJECTS IN VERYFI
When you add a new Account to your Chart of Accounts or a new Vendor or Customer / Job in your QuickBooks file you can update the lists in your Veryfi account by uploading an updated .IIF file to Veryfi as shown below:
VERYFI ON INTUIT APPS.COM STORE
If you enjoy how Veryfi works with QuickBooks, please leave us a review.
Thank you!
❤️ Team Veryfi